Tuesday, April 23, 2013

Boards Pt. 2

Well we had a decent weekend where I could work on the boards! and let me say I think they turned out great! especially since I don't have the steadiest hand in the world. Anyways on to the pictures!

This is my board. My wife wanted to have the Browning deer logo on the boards so I went with a orange one. Now the orange line is not very straight because the paint I used was meant for glass, when painted on it was transparent so I had to blob it on then try to straighten the line up with white paint. I guess it doesn't have to be perfect though since they are just corn hole boards.


And this is my wifes board. She wanted to have a pink Browning deer logo to match her pink bags. The pink paint was the same as the orange(made for glass) but it wasn't as hard to work with for some reason as this line came out way better!

I still need to add the final coat, its like a clear epoxy wax or something along those lines, after that then they are ready for play!

Wednesday, April 17, 2013

Boards

Hello again everyone! I must say my blog went from 74 views to 450ish over night!!! woohoo! 

Today I thought I would show the progress on my corn hole boards. They have been built, paint colors picked out, bags bought and decals bought, so now all I have to do is paint them and get them ready for play!

Here are the boards almost complete minus paint. My stepdad helped me build them.

This is a quick picture I made in Microsoft paint. Black outline, black triangle and black legs, then the white on the outside of the triangle. The pink drawing is supposed to be the Browning deer logo. My wifes board is going to have a pink deer and mine will be orange. We got matching bags too!


Another cool little thing I will be doing to the boards is adding some lighting to the hole and to the underneath of the board.


I ordered some white 3mm LED's from eBay. I then took a strand of old LED Christmas lights, took the LED's out of them and replaced them with the LED's I bought off eBay. I then dipped the tip of them into orange and pink paint so that way they would glow orange!


I also bought some El-Wire off eBay(I like eBay cant you tell?) Im not sure if I will be using this on the boards or not yet but this stuff is pretty cool. Its waterproof I have seen where people will sew it into their clothes it looks pretty awesome. 

Well thats all for the boards at the moment I still need to paint them so as soon as I do I will post the finished pictures on here.

Friday, April 12, 2013

Dressing up!

Back when I was in highschool I was obsessed with Chinese, Japanese, Korean culture. I loved the history, the landscape, their writing system everything! So my room was like a Chinese shrine! I had all kinds of stuff in there but the one thing I liked the most was a dresser that my mom had gotten for me at a auction. It was red scuffed up and had Chinese(or Japanese ) symbols for drawer knobs. Now that I'm older and have my own place I don't have as much of that stuff anymore, but I do still have the dresser. I thought it was time to fix up the ol' dresser and give it new life.


In this picture I had already started stripping the red paint off but you can still see the red paint that was on it. To strip it I used paint stripper, a putty knife and some steel wool. The paint was pretty old so it didn't take much to get it to come off. I was really surprised how nice the wood was underneath the paint, after all the red paint was off I rubbed it down with some paint thinner and let it dry. I then put some wood stain on it and some clear coat and it now looks like this.


In this picture the roller wheels are still on it but I ended up taking them off. For a old dresser I think it cleaned up nice :).

Controllers

Hello again! today I thought I would show some of the Xbox 360 controllers I have modded.

The first one I got a whole new shell and LED's with clear thumbsticks.


The next two I have already posted on the blog but I might as well put them on this post.


And the last one is my favorite! I added carbon fiber wrap to the bottom part of the controller.

Wednesday, April 10, 2013

Cruzin

Well its starting to warm up outside the perfect weather for taking a nice ride through the mountains! Today I thought I'd share all the vehicles I've owned.

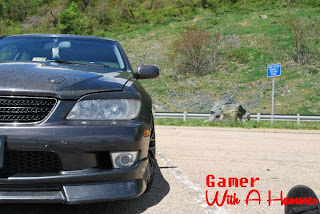
First up was my pride and joy! A 2002 Lexus IS300.
Her name was Evelyn! I bought this car from Tampa Florida. Now that may not seem like much but I live in Virginia. I flew down there bought it and drove it all the way back home. After a while the mod bug bit me so I started modding it a bit. First came wheels 18'' Gunmetal MSR wheels, then the 2 inch lowering springs, then the full WALD lip kit and headlight eyelids, Carbon fiber rear window spoiler, carbon fiber hood with aerocatch carbon fiber flush mount hood pins and red painted brake calipers with lexus decals.

funny story. One day I was at Advance auto and some guy walks up to me. He was talking about my car and how he liked it then he says " hey man I like them tail lights how much did they cost you? I want to get a set like that for my car" all I said was "oh about 16,500.00. The tail lights on the car are stock from the factory. He didnt say anything and just walked away haha.


I loved that car and I miss it like crazy!

Next up is my beloved 1989 Honda Civic Wagon DX, its also known as a Wagovan as the base model type of this is named a Wagovan.

I bought this car from a used car place for 1500.00 it had 135k miles on it, it was bone stock, had one owner who was a older army gent and it had service records a mile long. My type of car! now this car is different then what everyone else had around here, most of the time people have never heard of a Wagovan.


This picture is the day that I bought it. Completely stock but it didnt stay that way for long.

I had got this valve cover from the junk yard a while back for another civic that I had. I shaved all the lettering off the top and sprayed it with a high gloss white and then drew that picture on with a sharpie and spray painted a clear coat over top of it. I think it made the bland engine bay pop!

Then came a red stripe around the body lines and some yellow fog lights in the bumper.

Then I picked up some stock Honda fat 5's and painted them white then threw them on.


I then added a Yakima roof rack, Lowering springs and 8k HID headlights. I loved the way this car looked. It was so different then what everyone else had . I had just finished making this car the way I wanted it to look and then this happend.


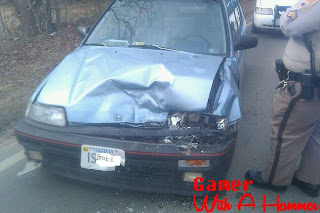
I was on the way back from my grandpas house and I didnt notice the truck in front of me was stopped because of a ambulance coming from the other direction. I hit him doing 45 MPH and let me tell you man that hurt. I had a wink mirror in my car. It went from the passenger side to the drivers side and it gave a panoramic view out the back so there were no blind spots. My face hit that and in turn it broke the windshield since I hit it so hard. Had to get a few stitches in my nose but other then that I didn't get banged up to bad.

After it sat a while I got it to look like this but I could never figure out why the motor wouldn't start so I ended up selling it.


Now comes the fun stuff!

My 1992 Honda CBR 600F2


This was my first bike. I got it when I was about 19 and still living at my parents place. Let me tell you my mom didn't like it at all, she wouldn't even let me buy a bike. You may be wondering how I got one then. I had been saving my money for a good while then I finally found a bike that I liked, It just so happens that weekend my family were taking the RV out and going camping so I called the guy up told him I would be down there to pick up the bike and be bringing it home. It was about a hour and a half drive away to pick it up, paid the guy loaded it up and brought it home without my mom knowing anything about it, or so I thought. My neighbors saw me unloading it and called up my mom and told her. When she got home she acted like nothing was wrong, didn't say anything about the bike. I finally told her I had bought one and she said "I know" she still didn't like the idea of me having one but eventually she came to accept it.

After a while I had to fix the broken plastics that were on it so I took them all off fixed them and painted them.


I think it came out looking really good. 

Well thats all for the cars today I will post more of my other vehicles later on.

Tuesday, April 9, 2013

Maverick Pt. 2

Well the cheapy headset got here! I tore into the project again as soon as I go the headset out of the mailbox. It was actually quite easy. If you can solder then its no problem doing this. I didnt take as many pictures as I should have but anyways on to the pictures.


The first thing I had to do was get the headset apart then once I got that apart I needed to figure out how I would run the wires through the flight helmet, to be able to do that the wires needed to be soldered so they would come off of the speakers.


Once I got them off of the speakers I needed to run them through the holes where the existing wires were in the helmet. It was a total pain trying to get them through! I ended up using a small long screwdriver and putting it through the hole till I could see it on the other side then I taped the wires on it and pulled them through. Then I soldered the wires/ microphone back onto the speakers and put them into the helmet. I used the old cups that the speakers were in the helmet to begin with that way it would have the same look on the outside of the helmet. 


The above picture is the finished product! but notice the grey cloth on the inside of the ear cups, remember how it used to be tan? well lets just say superglue and leather don't mix! I had put some on to glue it back on the metal plate on the inside of the ear cup. The glue reacted with the leather or something because it got extremely hot! so hot that I had to drop it because it was burning my hand! so I just put the grey fabric in there instead. I still think it turned out good.


All in all It was a very easy project. I may even try to find a cheap set of turtle beach x12's to try and put into it since they would sound awesome in this helmet.  Total time working on this was about a hour and a half but not all at one time, the total cost was about 25.00 so not bad at all!

Tuesday, April 2, 2013

You may call me Maverick!

Well I have started another project (well sorta) This one I have been wanting to do for a while but I never got around to it.


This is a MIG-15 flight suit headset helmet. I bought my helmet a little before Halloween because Dylon and I one night were playing Battlefield 3 at his house. We were in the jets taking down every enemy we saw, then two pretty decent pilots got in the other teams jets and were quick on our tails. Next thing I know Dylon's girlfriend starts playing Danger Zone (the Top Gun movie theme song) we got into the zone, one of them was behind me and the other behind Dylon. I was able to shake the one that was on me and I did a quick turn around got behind him and it was all over, quick shots of the machine gun on my jet and he went up in flames. I quickly circled around to check on Dylon and then it happened, I saw the shots the smoke and the fire I yelled out NOOO GOOSE!!! and Dylon started laughing. It was quite dramatic but extremely funny we felt like we were in the movie. 


Anyways back to the helmet. I bought this because after that night we decided to be Maverick and Goose for halloween (my family has a huge haloween party every year) but my wife and his girlfriend decided we would all go as batman characters, so I've had this helmet laying around for a while.


This is a cheapo Xbox Live headset that I just bought off eBay.

Do you see where im going with this now? Yep I will be gutting the headset out of the MIG-15 skull cap and putting the inner workings of this cheapo headset into it! I just won the auction for the headset so once it gets here I will be starting with this project so keep checking back.


EDIT:

Well I started cutting into the flight suit helmet to get the existing headset out so once my cheapo headset gets here I can start putting everything into the helmet.


First i needed to get on the inside of the helmet without it being noticeable. In the picture above I decided that going through the ear pieces would be the best option, so I grabbed my box cutter and started cutting. There were about three layers I had to go through, the first layer was the tan leather type of material then a flat piece of metal that made the ear piece solid and has the arm that holds the microphone on and then a thin layer of green fabric that looks like the fabric on the outside. This below picture is of all the layers including the speaker.


After I got both sides open it was time to get the existing wires out of the helmet. Below you can see the wires for the speakers.


In total there were about four wires on the inside. I would have left them in there but they took up all the space in the tunnels that were made when the helmet was sewed together, and I needed all that space so I could run the new wires from the new headset through them. My cheap-o headset should be here tomorrow so as soon as it gets here I will post some pictures of my progress.